If you’ve been looking at your ceiling lately and thinking it could use a little love, you’re not alone. Many of us have beautiful visions for our homes but get stuck when it comes to decorating the often-overlooked fifth wall. This post is for anyone who feels that blank expanse overhead is a missed opportunity for creativity. Whether you’re a seasoned DIYer or just starting out, I’m excited to share these cheap ceiling covering ideas that will transform your space without breaking the bank. If you’re someone who loves to decorate but worries about costs, you’re in for a treat. The 19 ideas I’ve gathered here are not only visually appealing but also wallet-friendly. From painted ceilings to fabric draping and everything in between, there’s something for every taste and skill level. You’ll find options that are easy to accomplish and can make a big impact, ensuring your ceiling becomes a focal point rather than a forgotten afterthought. By the time you finish reading, you’ll be armed with practical and stylish solutions to upgrade your ceilings. You’ll discover how to bring a fresh, personalized touch to your home with these affordable ceiling designs. Let’s get inspired and breathe new life into those overhead spaces!
Key Takeaways
– Embrace creativity with a variety of budget-friendly ceiling options that suit any style. – Explore DIY ceiling decoration ideas that are easy to implement and require minimal materials. – Learn how to incorporate decorative ceiling treatments to add unique character to your rooms. – Discover practical tips for transforming your space with low-cost ceiling makeover ideas. – Create an inviting atmosphere by using these ideas to enhance your home’s aesthetic appeal without overspending.Contents
- 1. Fabric Draping
- 2. Painted Ceilings
- 3. Wood Planks
- 4. Tin Tiles
- 5. Wallpapered Ceilings
- 6. Gypsum Board
- 7. Stenciled Designs
- 8. Fabric Panels
- 9. Cork Tiles
- 10. String Lights
- 11. Faux Beams
- 12. Textured Ceiling Tiles
- 13. Ceiling Murals
- 14. Bamboo Panels
- 15. Fabric Wall Tapestries
- 16. Acoustic Panels
- 17. Dried Flower Ceilings
- 18. Painted Stars
- 19. Reclaimed Wood
1. Fabric Draping
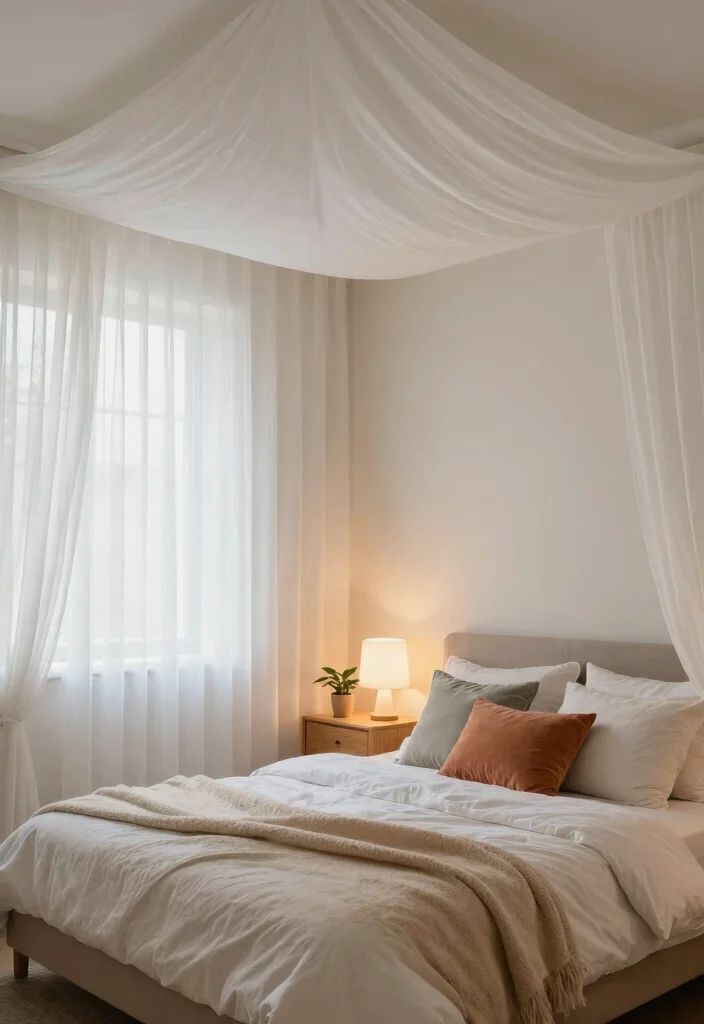
Elevate your space with the soft allure of fabric draping on your ceiling. This technique introduces warmth and a touch of elegance, transforming any room into a serene retreat. Light fabrics like tulle or sheer cotton create a dreamy atmosphere, while luxurious velvet adds a dramatic flair. You might consider draping fabric above a bed or creating an inviting ambiance over a dining area, letting the fabric flow gracefully.
To maximize this design, think about your fabric choices and installation methods. You don’t need to break the bank; inexpensive curtain panels can work wonders. Explore various textures and colors to enhance your space’s overall aesthetic while staying connected to current design trends.
Consider these steps to achieve stunning fabric draping:
– Pair airy fabrics with contrasting textures for depth.
– Install fabric with adhesive hooks for easy removal.
– Use lighting underneath to create a cozy glow.
This approach not only adds sophistication but also invites a sense of comfort. The interplay of fabrics and textures enhances the inviting atmosphere of your home.
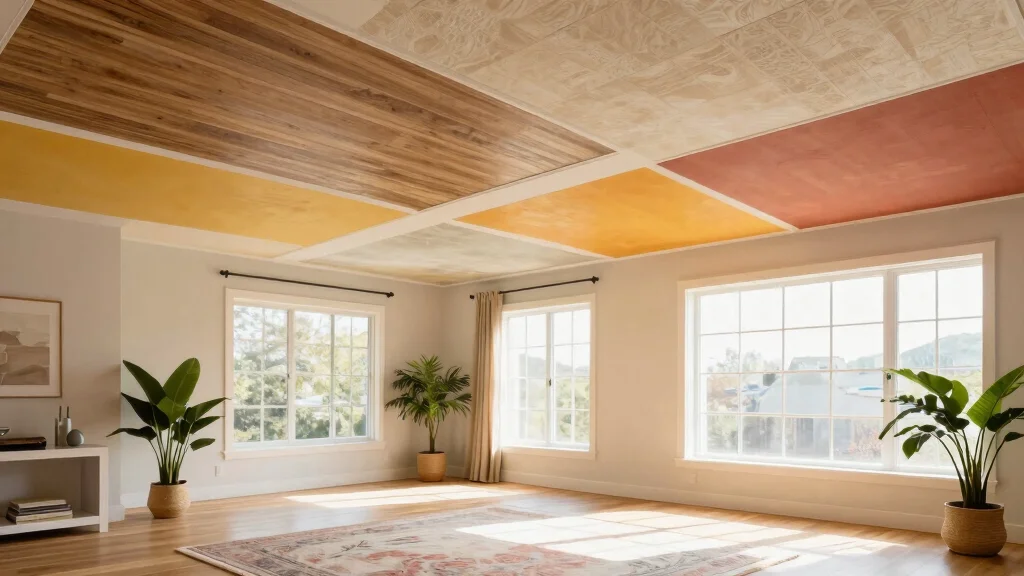
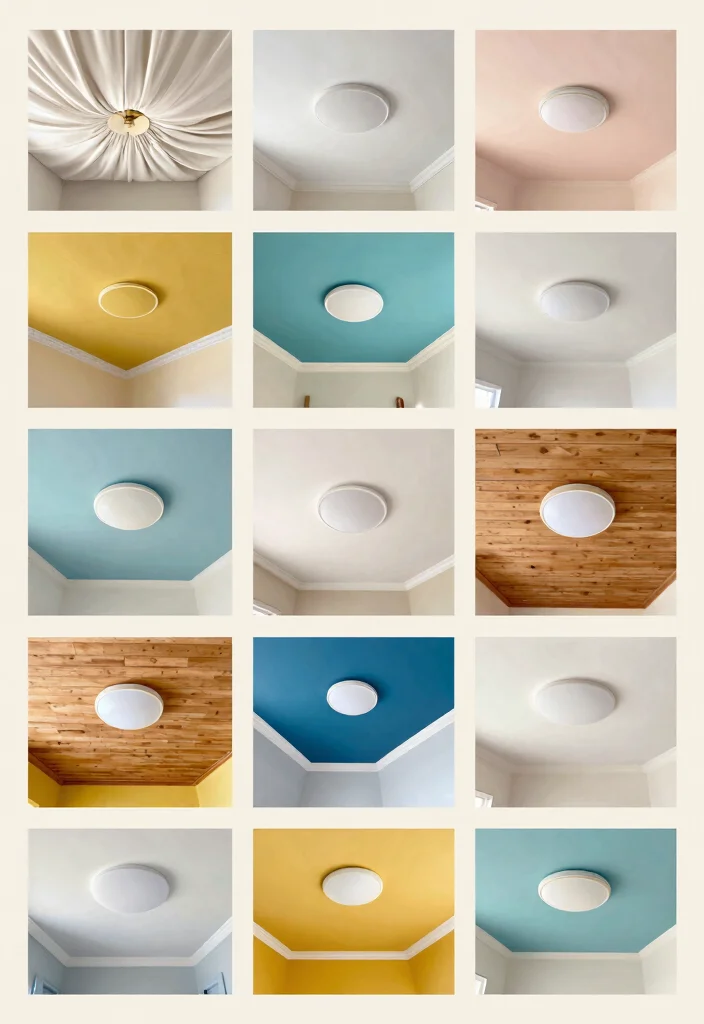
2. Painted Ceilings
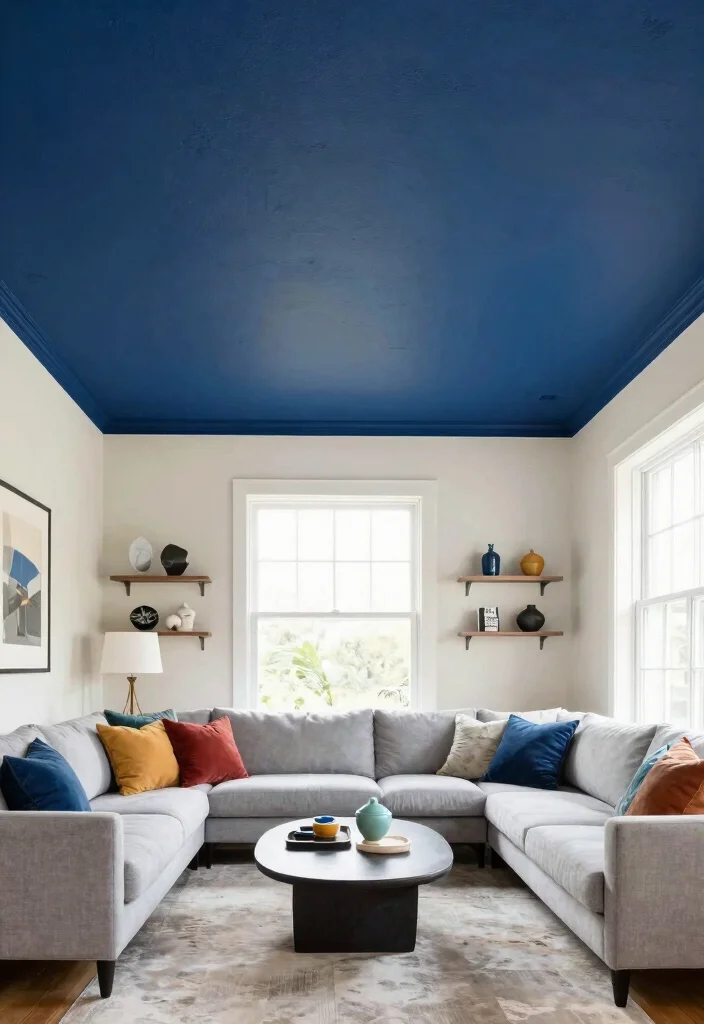
A freshly painted ceiling can instantly transform your space. Choosing a bold color, like deep navy or rich emerald, can foster a cozy and intimate ambiance. Alternatively, soft pastels can open up a room, making it feel airy and bright. You might opt for geometric patterns with painter’s tape for a modern twist or simply cover the entire ceiling for a unified look.
To implement this idea without overspending, consider using leftover paint from previous projects or purchasing mistints from your local store. A satin or eggshell finish will reflect light beautifully and create a polished look. Don’t forget to test color samples on your ceiling to see how they change with natural light throughout the day.
Follow these steps for a flawless ceiling paint job:
– Clear the area by moving furniture or covering it.
– Repair any damages with spackle before painting.
– Use painter’s tape for crisp edges and patterns.
This vibrant approach not only refreshes your ceiling but also elevates the entire room’s character, making it a focal point of style.
3. Wood Planks
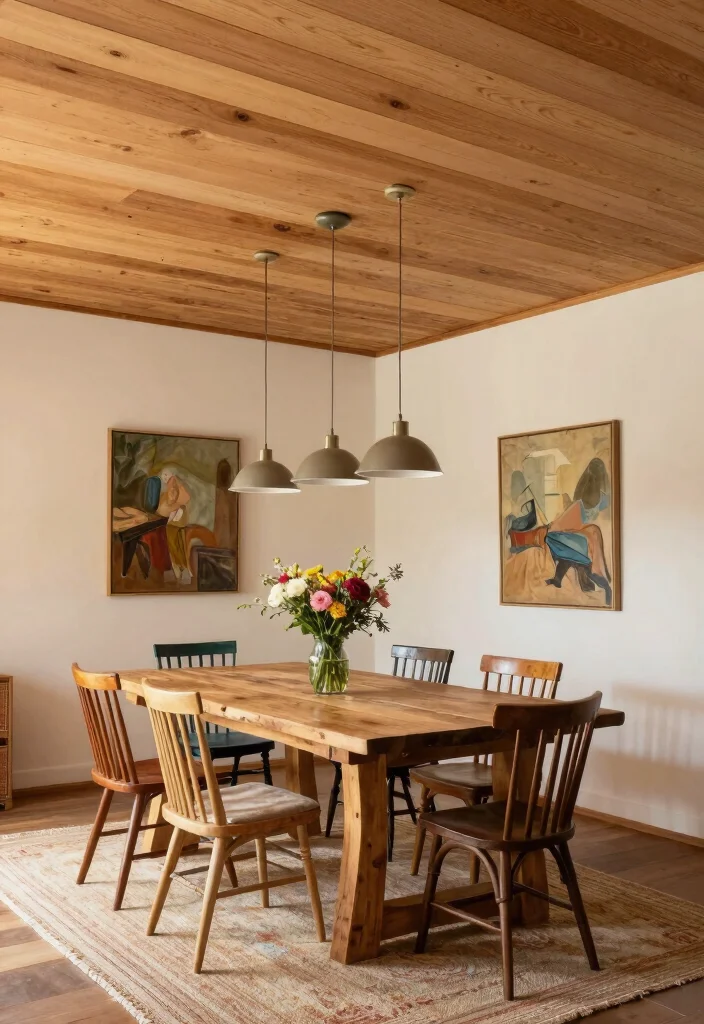
Transform your ceiling with the natural beauty of wood planks, adding both warmth and character to any room. Whether you lean towards reclaimed wood for a rustic vibe or sleek modern planks, this treatment introduces a unique element to your design. A fun DIY project, you can customize the look by leaving the wood natural, staining it, or even painting it for a fresh appearance.
Embrace a creative installation by measuring your ceiling and selecting varying plank widths for added visual interest. Affordable options like plywood can be used, and a nail gun can speed up the process. Pair your wood ceiling with recessed lighting to highlight its texture and bring a cozy glow to the space.
Here’s how to get started with wood planks:
– Choose a mix of wood types for contrast and warmth.
– Install planks staggered for a more organic look.
– Finish with a sealant for durability.
This method not only enhances the room’s aesthetic but also invites a sense of nature indoors, creating a warm and inviting atmosphere.
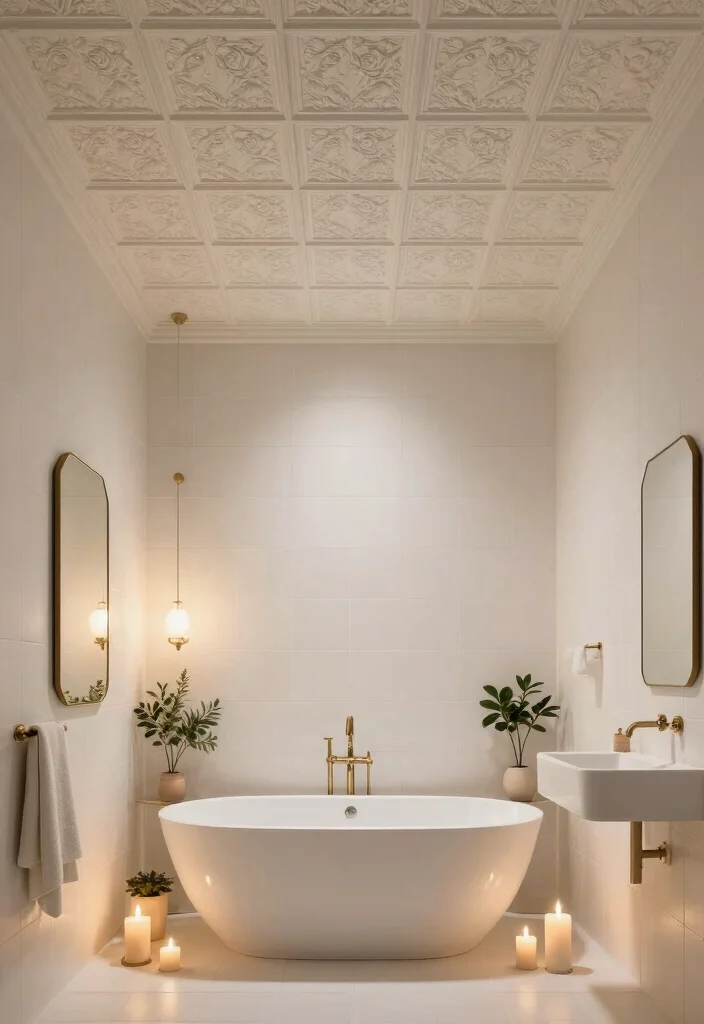
4. Tin Tiles

For a touch of vintage charm, consider tin tiles on your ceiling. These decorative elements bring elegance and character without a hefty price tag. Faux tin tiles are lightweight and easy to install, offering a quick upgrade that works beautifully in kitchens, bathrooms, or dining areas. You can paint them a bold color or leave them metallic for a classic touch.
To enhance your design, look for tiles that complement your existing decor. They are durable and easy to clean, making them perfect for high-traffic areas. You can also create custom designs by cutting the tiles to fit your space perfectly.
Here are some tips for installing tin tiles:
– Start from the center to achieve even spacing.
– Use adhesive for a quick application process.
– Finish with a clear coat for added shine.
This approach not only elevates your space but also reflects light beautifully, enhancing the overall brightness and charm of your room.
5. Wallpapered Ceilings
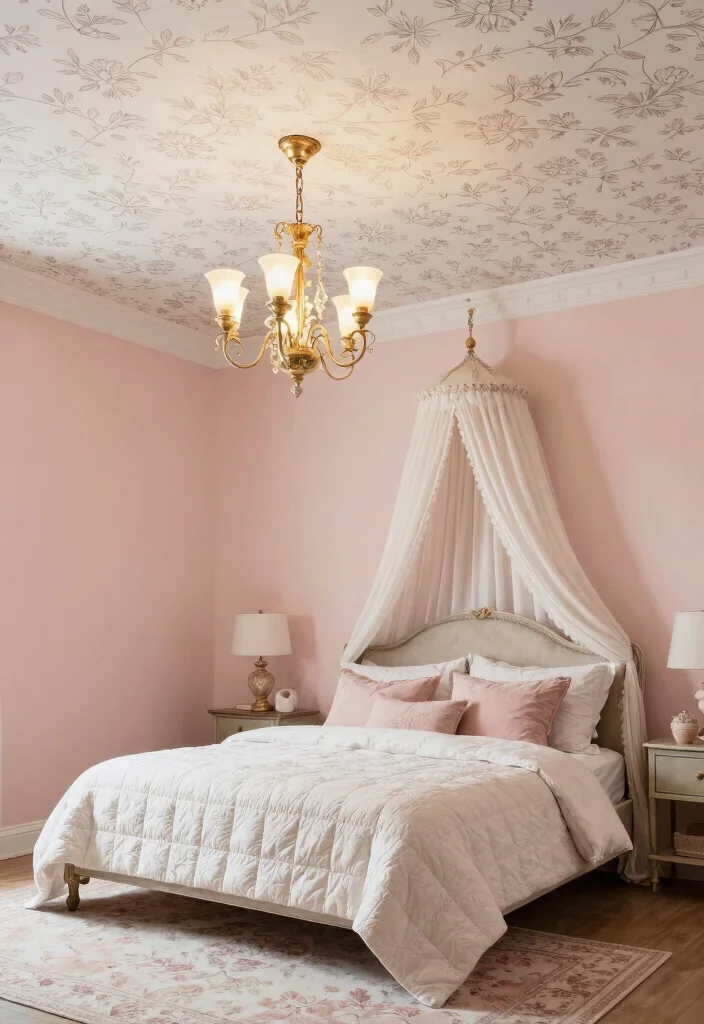
Bring creativity to your ceiling with wallpaper that adds an unexpected twist. Bold patterns and intricate designs can create a stunning statement above. Removable wallpaper is ideal for those who enjoy change or rent their living space. The scale of your chosen patterns plays a crucial role; larger designs can dominate, while smaller prints offer a subtle effect.
Ensure your wallpaper is suitable for ceilings to avoid peeling and consider pairing it with understated decor for balance. Light colors can help make the room feel more spacious, while patterns can add depth and intrigue.
To wallpaper your ceiling, follow these steps:
– Measure and cut wallpaper strips to fit.
– Apply adhesive to the back or the ceiling.
– Smooth down to eliminate bubbles for a flawless finish.
This unique ceiling treatment allows your personality to shine while enhancing the overall decor, creating a delightful focal point in your home.
📹 Related Video: Applying Wallpaper To A Ceiling
How To Choose the Right Ceiling Covering
When it comes to enhancing your home decor, choosing the right ceiling covering can make a big difference. With so many cheap ceiling covering ideas available, it’s essential to know what to look for. Here are some key selection criteria to consider: 1. StyleThink about the overall theme of your room. Do you prefer a modern, rustic, or bohemian look? Your ceiling covering should complement your existing decor. For example, wood planks work great in a rustic setting, while painted ceilings may suit a modern aesthetic. Consider how the ceiling treatment will flow with your furniture and wall colors as well.
2. Material
The material you choose affects the look and durability of your ceiling covering. Options include fabric, wood, metal, or wallpaper. Each material has its own benefits. For instance, fabric draping adds softness, while tin tiles offer a more industrial vibe. Make sure to pick a material that fits your lifestyle and maintenance preferences.
3. Installation
Consider how easy it is to install the ceiling covering. Some options, like painted ceilings or wallpapered ceilings, may require more skill or tools. Others, like fabric panels or acoustic tiles, can be DIY-friendly. If you’re not comfortable with complex installations, look for options that you can handle without professional help.
4. Budget
Set a budget before you start shopping. Some ceiling coverings can get pricey, but there are plenty of affordable ceiling designs that look great. Take note of the cost of materials and any additional tools you’ll need for installation. Remember, sticking to your budget doesn’t mean sacrificing style!
5. Maintenance
Think about how much upkeep you’re willing to do. Some ceiling treatments require regular cleaning or upkeep like painted ceilings, which may need touch-ups over time. On the other hand, tiles or metal can be easier to maintain. Choose a covering that fits your lifestyle and the time you have to invest in maintenance.
6. Lighting Considerations
Your ceiling covering can affect the way light reflects in your space. Dark colors or heavy materials can absorb light, making a room feel smaller. Conversely, lighter colors or shiny materials can brighten a room. Think about how natural and artificial light will interact with your chosen covering.
Pro Tip: Always request samples of materials before making a final decision. This allows you to see how they look in your space with different lighting throughout the day. It also helps you ensure the texture and color fit your desired style. Get creative and mix different materials for a unique ceiling design!
6. Gypsum Board
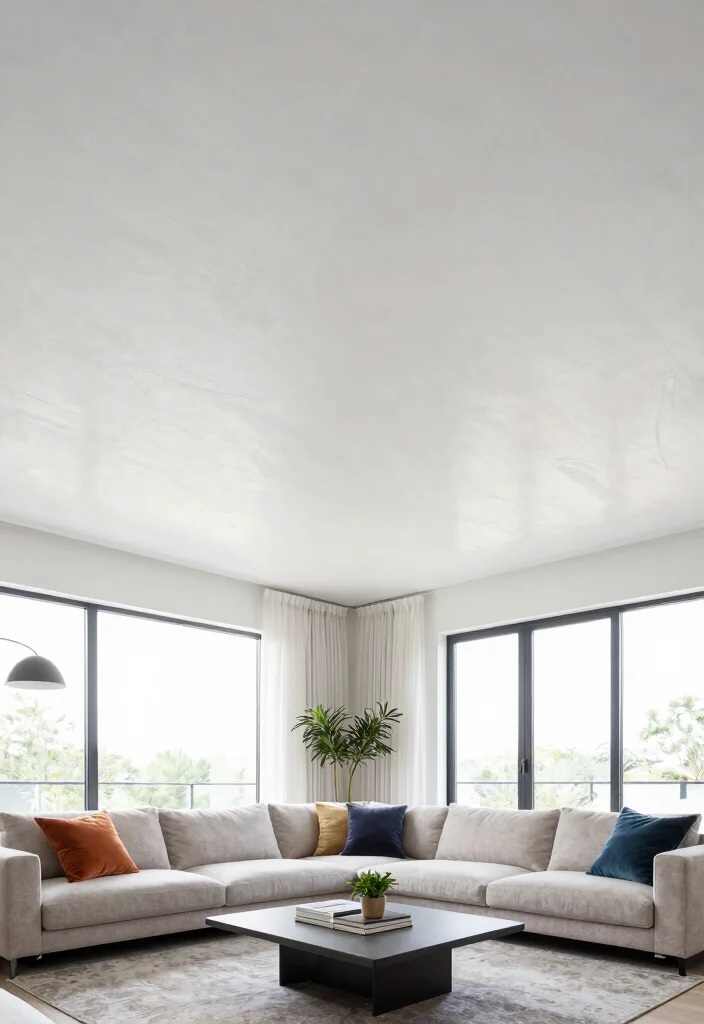
Gypsum board ceilings offer a versatile and budget-friendly option that can seamlessly fit into any home. This smooth surface is easy to customize, allowing for a variety of finishes, whether you prefer a sleek modern look or a textured finish. Gypsum boards can effectively conceal wiring or ductwork, presenting a clean and polished appearance.
To implement this, consider creating drop ceilings or curved edges to soften the lines of the room. Gypsum boards are lightweight and can be cut to size, making them manageable for DIY enthusiasts. You can also paint or texture them to match your desired aesthetic.
Here’s how to work with gypsum board:
– Measure and cut the boards accurately.
– Install furring strips to mount the boards properly.
– Tape and mud the seams to ensure a flawless finish.
This practical choice not only enhances the design but also provides good insulation, making your home more comfortable.
❝ These cheap ceiling covering ideas start with gypsum board ceilings that are affordable and versatile. They hide wiring and ductwork while letting you craft drop ceilings or curved edges for a clean, modern look. Pro tip: pair with a lightweight finish to keep it budget-friendly. ❞
7. Stenciled Designs
Add personality to your ceiling with stenciled designs that bring charm and creativity to your space. This technique allows you to create intricate patterns without the permanence of paint or wallpaper. Seek out stencils that resonate with your decor style, whether they feature geometric shapes or floral motifs. This is a fun DIY project that can be completed in just a weekend.
Use a sponge or roller for even paint application, ensuring a professional-looking finish. Starting from the center helps maintain symmetry, while metallic paints can add a touch of glamour to your design.
Follow these steps to create stunning stenciled ceilings:
– Choose your stencil and gather supplies.
– Clean the ceiling surface for better adhesion.
– Secure the stencil in place with painter’s tape.
This creative approach not only personalizes your ceiling but also creates a captivating focal point that draws the eye upward.
8. Fabric Panels

Fabric panels are an affordable way to introduce softness and sound absorption to your ceiling. With a wide variety of colors, textures, and patterns available, you can tailor the look to your unique style. Arranging panels in a grid or random layout adds a dynamic touch to your design. This idea works wonderfully in spaces like home theaters or nurseries, where reducing echo is beneficial.
Choosing lightweight fabric simplifies installation, while patterns that resist fading will maintain their beauty over time. Adding foam backing can further enhance soundproofing capabilities.
Here’s how to install fabric panels:
– Measure the area you want to cover.
– Cut fabric into desired shapes for your design.
– Use adhesive spray or hooks for attachment.
This approach not only enhances your ceiling’s aesthetics but also creates a warm and inviting atmosphere in your space.
9. Cork Tiles
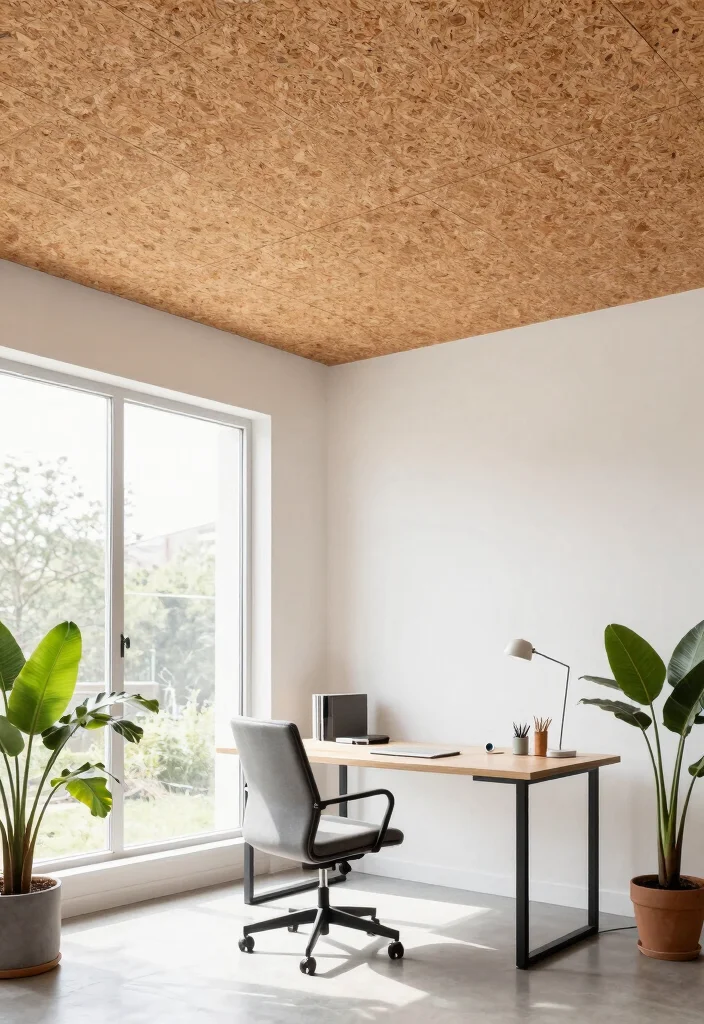
Cork tiles provide a warm texture and eco-friendly option for your ceiling treatment. Lightweight and simple to install, cork tiles are perfect for budget-conscious homeowners seeking a stylish look. They can be left natural for rustic charm or painted for a vibrant pop of color. Additionally, cork offers excellent insulation and noise-reduction properties, making it a practical choice.
To ensure a beautiful finish, consider sealing cork tiles to protect them from moisture, especially in high-humidity areas. Their natural resistance to mold and mildew enhances their longevity and appeal.
Follow these steps for cork tile installation:
– Clean the ceiling surface thoroughly before application.
– Measure and cut tiles to fit your area perfectly.
– Apply adhesive and press each tile firmly in place.
This unique ceiling solution not only enhances your decor but also contributes to a cozy and welcoming environment.
10. String Lights
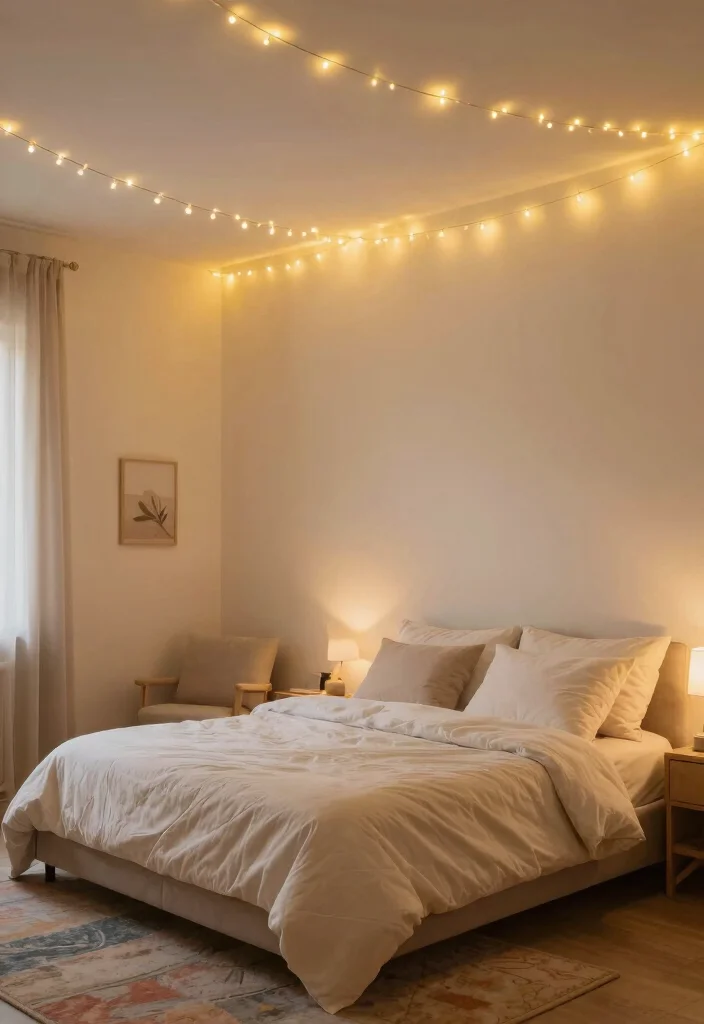
String lights can transform your ceiling into a whimsical wonderland. Drape them across your ceiling or create intricate patterns that enhance the ambiance of any room. LED string lights are energy-efficient and perfect for adding a warm glow to spaces like bedrooms, living rooms, or outdoor areas.
Opt for warm white lights for a cozy atmosphere, and consider combining them with other ceiling treatments for added flair. Dimmers can also be added for adjustable brightness, allowing you to set the mood in any setting.
Here’s how to incorporate string lights effectively:
– Plan your layout for a visually appealing design.
– Secure hooks or adhesive clips to hold the lights.
– Ensure the lights are plugged in and functioning.
This enchanting treatment not only beautifies your ceiling but also creates a captivating and inviting space.
11. Faux Beams
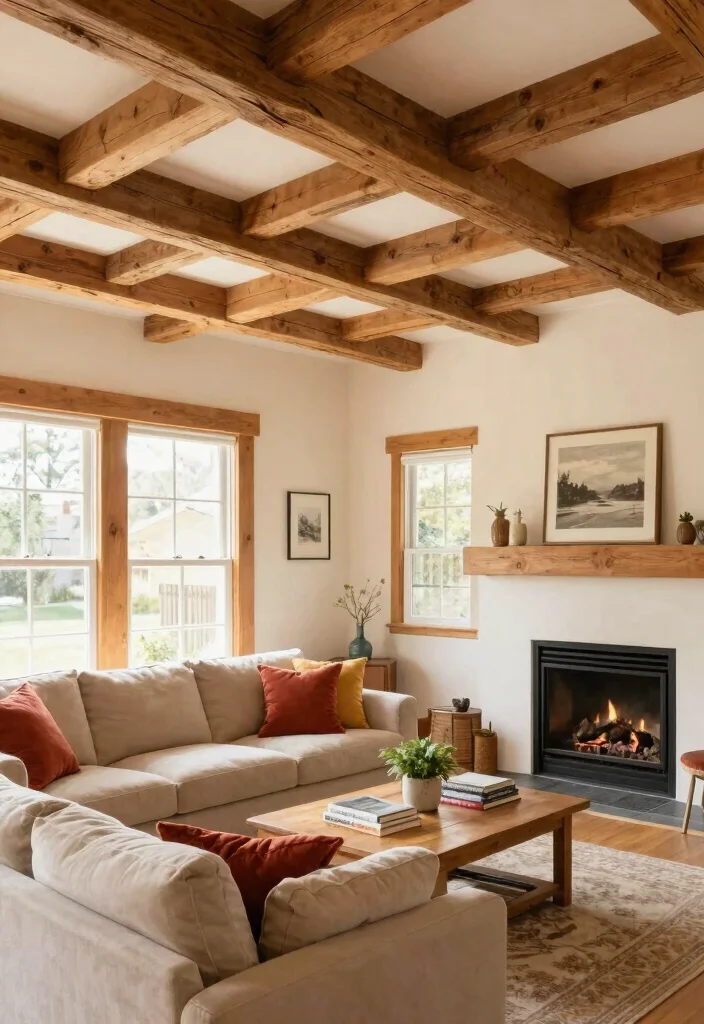
Faux beams introduce stunning architectural elements without the high cost of real wood. They can create a rustic or contemporary look depending on your chosen finish and style. Adding faux beams across your ceiling can create dimension or frame specific areas, like a dining nook, making the room feel more inviting.
When selecting faux beams, ensure they match your existing decor for a cohesive appearance. Painting or staining them can enhance their charm, while varying sizes and orientations add an interesting dynamic.
To install faux beams, follow these steps:
– Measure the area where you want to place the beams.
– Cut the beams to the desired lengths for a perfect fit.
– Attach them securely using brackets or adhesive.
This approach not only enhances the room’s overall aesthetic but also adds a touch of rustic warmth to your home.
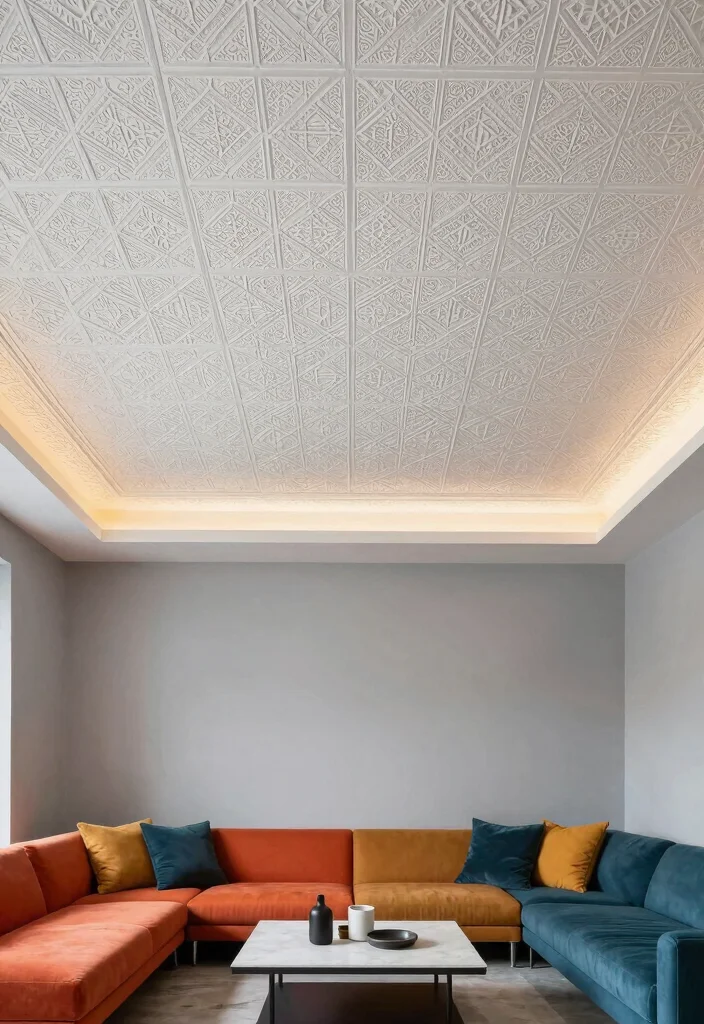
12. Textured Ceiling Tiles
Textured ceiling tiles can add remarkable dimension and character to your home. Affordable and often self-adhesive, these tiles offer an easy installation solution. Look for tiles with raised designs or intricate patterns that will make a statement in spaces like kitchens or bathrooms.
Choosing tiles that are easy to clean is essential, especially in high-traffic areas. Mixing different textures can create a dynamic effect, enhancing the overall visual appeal.
Here’s how to install textured ceiling tiles:
– Ensure your ceiling is clean and dry for optimal adhesion.
– Measure and cut tiles to fit your desired area.
– Peel off the backing and press each tile firmly against the ceiling.
This treatment not only enriches your ceiling with texture but also transforms your room into a visually engaging environment.
13. Ceiling Murals
Ceiling murals provide an artistic flair that can turn your space into a true masterpiece. You can choose from various themes like nature scenes or abstract designs that resonate with your style. This option is ideal for those who enjoy a hands-on approach, whether as a DIY project or through professional installation.
Murals can create a focal point and inspire creativity in any room. They can also make small spaces feel larger and more inviting.
To achieve a beautiful ceiling mural, follow these steps:
– Select a design that integrates well with your decor.
– Prepare the ceiling surface for painting or application.
– Use a projector or stencils to outline your design.
This artistic approach not only personalizes your space but adds a unique touch that captures attention and sparks imagination.
14. Bamboo Panels

Introduce a touch of nature indoors with bamboo panels, a sustainable ceiling option. These lightweight panels can be painted, stained, or left natural, catering to your desired aesthetic. Installing bamboo in long strips can create a contemporary look, while a crisscross pattern adds an eclectic vibe.
Bamboo also helps with insulation, making it a practical choice for both style and comfort. Ensure you seal bamboo panels to protect them from moisture in areas with high humidity.
Here’s how to install bamboo panels:
– Measure and cut panels to fit your ceiling space.
– Apply adhesive or use nails for secure attachment.
– Align panels carefully during installation for a polished finish.
This natural treatment not only enhances your ceiling but also creates a serene and inviting atmosphere in your home.
15. Fabric Wall Tapestries

Fabric wall tapestries aren’t just for walls; they can make a dramatic statement on your ceiling too! Hanging a large tapestry adds color and texture, creating a focal point that draws the eye. This idea is particularly suitable for renters who want to avoid permanent changes while expressing their style.
Choose tapestries that reflect your taste and coordinate with your existing decor. They can be easily swapped out, allowing you to refresh your space according to the seasons or your mood.
To hang fabric wall tapestries, follow these steps:
– Select a tapestry and measure the installation area.
– Clear the space to prepare for hanging.
– Use hooks or rods to securely attach the tapestry.
This creative ceiling treatment not only adds visual interest but also infuses warmth and personality into your home.
Fun fact: a single large fabric tapestry can cover up to 60% of your ceiling, delivering cheap ceiling covering ideas that are easy to swap out. Choose tapestries in colors that coordinate with your decor for an instant focal point.
16. Acoustic Panels

Acoustic panels blend functionality with style, controlling sound in your space while serving as a unique ceiling treatment. Available in an array of colors and designs, they can elevate the aesthetics of any room. These panels are ideal for home theaters, music rooms, or creative studios where sound quality matters.
Acoustic panels can be cut into various shapes and arranged in captivating patterns, adding a modern touch to your ceiling. They are easy to install without requiring special tools, making it a DIY-friendly option.
Here’s how to install acoustic panels:
– Measure your ceiling area for an effective layout.
– Choose panels that suit your style and sound needs.
– Use adhesive or mounting hardware for secure attachment.
This practical ceiling treatment not only improves sound quality but also enhances the overall design of your space.
17. Dried Flower Ceilings
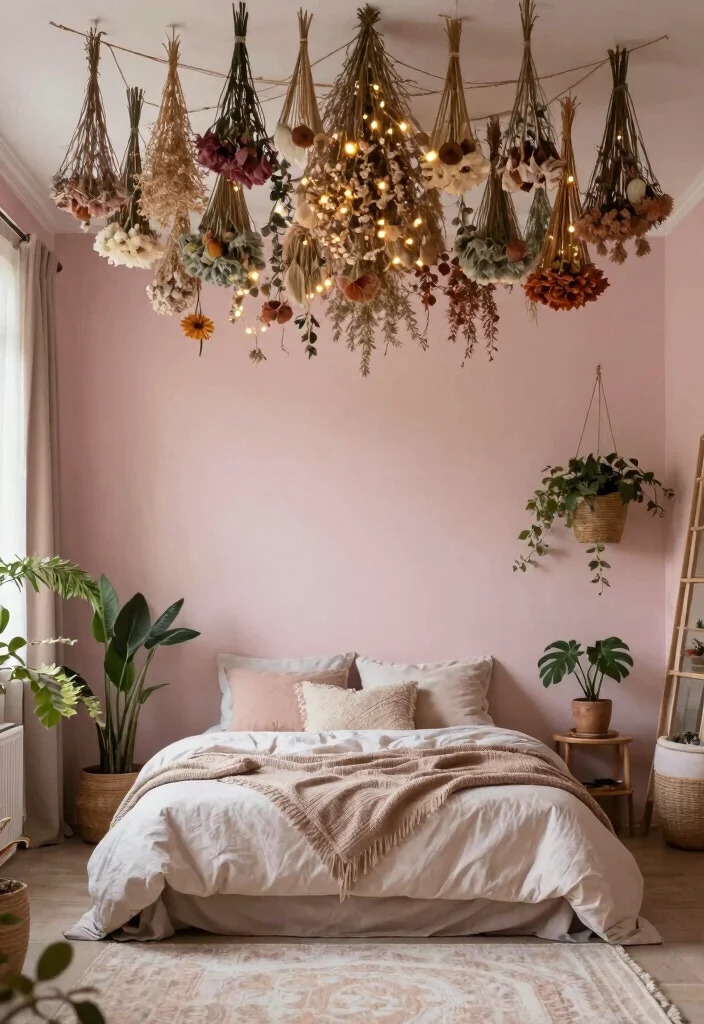
Dried flowers are trending in home decor, making for a stunning ceiling treatment that adds a whimsical touch. This bohemian style injects natural beauty into any room, whether arranged in wreaths, garlands, or scattered bunches. It’s a perfect choice for spaces like bedrooms or studios where you want to embrace a bit of nature indoors.
Ensure that the flowers are properly dried to avoid pests and use lightweight materials for easy hanging. Mixing different colors and types of flowers can create a visually striking display.
Here’s how to create a dried flower ceiling:
– Gather dried flowers and greens along with your hanging materials.
– Arrange them creatively to suit your ceiling space.
– Use hooks or twine to secure the flowers in place.
This natural ceiling treatment not only beautifies your space but also brings a fresh, organic vibe that enhances your home’s charm.
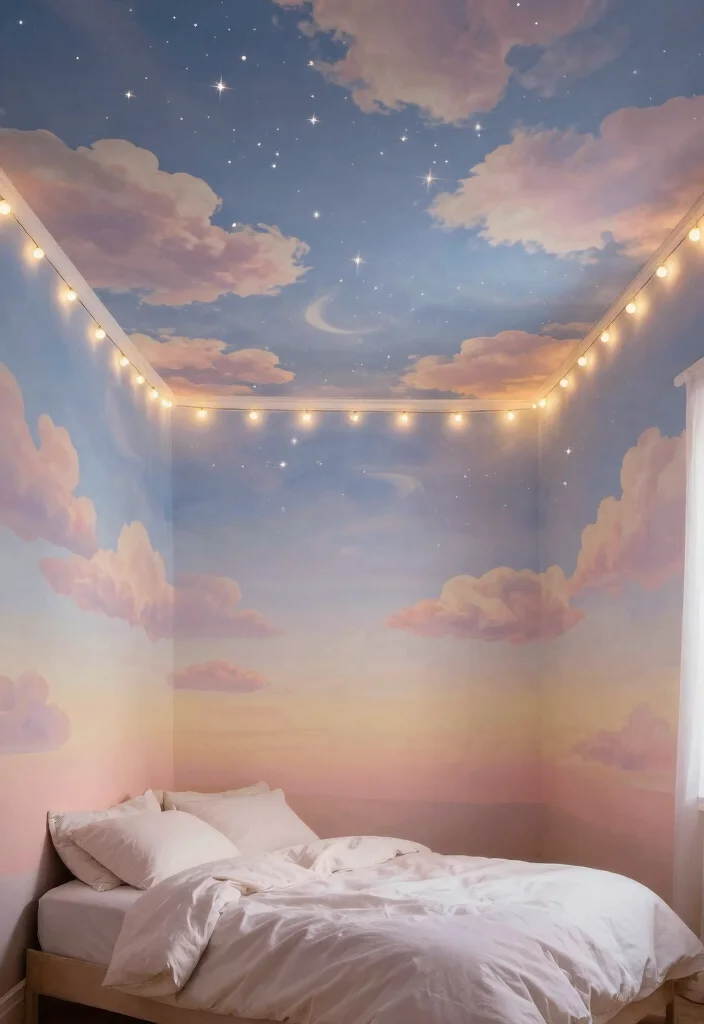
18. Painted Stars
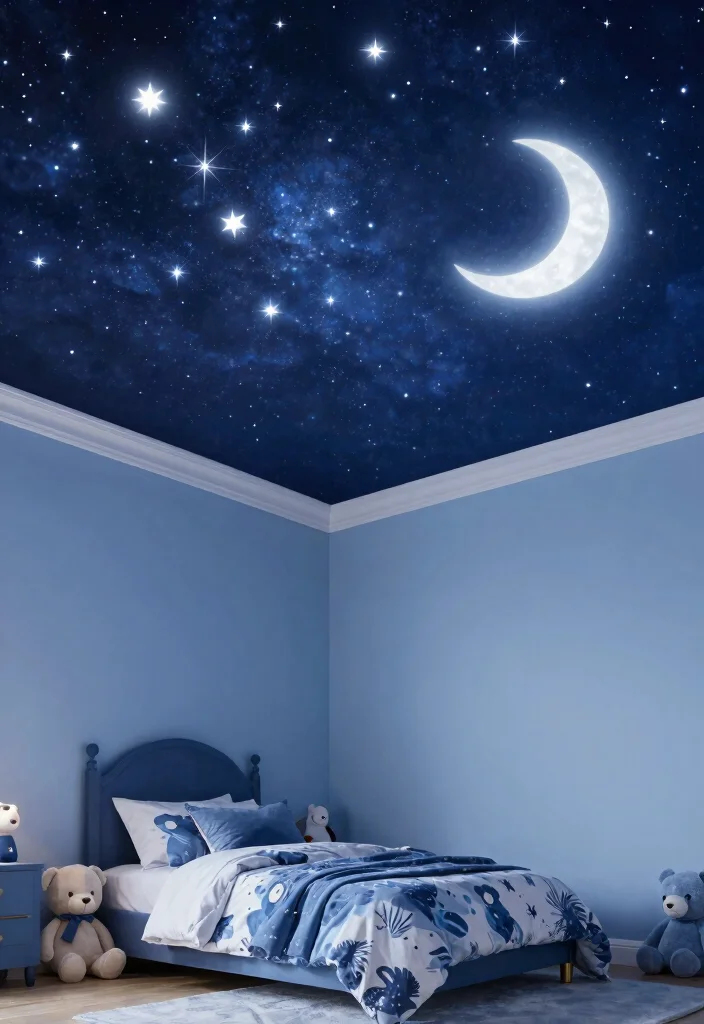
Why not transform your ceiling into a magical night sky? Painting stars can create a calming and whimsical atmosphere, making it especially enchanting for children’s rooms or anyone looking for a dreamy space. Using luminous paints that glow in the dark can enhance the celestial effect, and adding planets or clouds can further enrich the theme.
For cleaner star shapes, stencils can be a helpful tool, while painting the entire ceiling a deep blue or black provides a stunning backdrop. Ensure proper ventilation when painting for a safe and pleasant experience.
Follow these steps to create your starry ceiling:
– Prepare the ceiling by cleaning and priming it.
– Lightly sketch your design with a pencil.
– Use stencils or freehand your stars using a brush.
This creative endeavor not only brings enchantment to your space but also invites wonder and imagination into your home.
19. Reclaimed Wood

Reclaimed wood introduces history and warmth to your ceiling, offering an eco-friendly option that is both stylish and unique. Sourcing wood from old barns, pallets, or furniture gives your ceiling character and a touch of rustic charm. You can install it in planks for a classic look or create a full wood ceiling for a dramatic effect.
Ensure to check for any harmful materials like lead paint and sand the wood to avoid splinters. Using a mix of wood tones can add depth and interest to your ceiling design.
Here’s how to incorporate reclaimed wood:
– Find reclaimed wood from local suppliers or online resources.
– Measure and cut the wood to fit your ceiling.
– Secure the wood using nails or adhesive.
This beautiful ceiling treatment not only enhances your decor but also tells a story, making your home feel warm and inviting.
Fun fact: Reclaimed wood can lower costs by up to 40% compared to new planks, a smart move for cheap ceiling covering ideas that add authentic history to your ceiling. Pro-tip: source from barns or pallets, check for lead paint, and sand to smooth splinters.
Conclusion
There are so many ways to enhance your ceiling without spending a fortune. From fabric draping to painted stars, each idea can bring your personal style to life. Consider trying one or several of these budget-friendly options to add charm and character to your space. Get creative and remember that a ceiling makeover can be an enjoyable DIY project, turning your home into a true reflection of your personality!
Frequently Asked Questions
What are the best cheap ceiling covering ideas that still look stylish?
There are plenty of cheap ceiling covering ideas that look stylish and are doable on a weekend.
Start with painting the ceiling a bright, reflective color to instantly open up the room. For a bigger change, install peel-and-stick vinyl planks or lightweight foam ceiling tiles—these are quick, affordable, and beginner-friendly. If you prefer a more traditional look, add beadboard or thin plank panels. To boost texture without bulk, try a simple ceiling stencil or geometric pattern with paint. These options require basic tools, careful measuring, and a little patience, but the results can be dramatic on a budget.
How can I achieve affordable ceiling designs on a budget without major renovations?
Achieving affordable ceiling designs is all about clever, lightweight updates.
Start with color and pattern: paint a fresh color or use tape and stencil to create stripes or shapes. Try budget-friendly ceiling options like peel-and-stick tiles, PVC panels, or beadboard that install with adhesive or a few nails. Add decorative lighting or perimeter lighting to add drama without remodeling. Finally, plan the project in stages to spread out costs, and reuse leftover materials for a cohesive look.
Which DIY ceiling decoration ideas are budget-friendly and easy for beginners?
Great for beginners: DIY ceiling decoration ideas that save money and add personality.
Start with tape-and-paint patterns or stencils to create a modern ceiling motif. Use decorative ceiling treatments like beadboard or foam panels that cut with scissors and stick on. Install a lightweight lattice or woven fabric panel for texture. Update lighting with a simple ceiling medallion or by refreshing the fixture to highlight the new ceiling. Each idea uses common tools and minimal woodworking, making it beginner-friendly.
What decorative ceiling treatments are budget-friendly and look high-end?
Budget-friendly options that look premium include decorative ceiling treatments like beadboard, lattice panels, and PVC faux-wood planks. Create a coffered effect by framing sections with thin trim and painting the recessed areas a contrasting color. Add a subtle border or crown molding around the perimeter for a refined touch. These treatments stay light on your budget and can be installed with simple tools.
Are there low-cost ceiling makeover ideas that are easy to install for beginners?
Absolutely. Try low-cost ceiling makeover ideas such as painting, using peel-and-stick tiles, adding beadboard, or applying lightweight fabric panels. Start with accurate measurements and a clear plan, then: 1) prep the surface (fill holes, sand rough spots), 2) cut materials to size, 3) apply adhesive or nails, 4) seal seams with caulk. Finish by upgrading lighting to tie the ceiling to the room’s style, all without breaking the bank.