


You can reduce stair-related falls by up to 90% with properly installed carpet, yet most homeowners hesitate to tackle this project themselves. You’re about to discover that installing stair carpet requires only basic tools, a single weekend, and roughly $200 to $600 depending on whether you select a 100% nylon runner, a 50/50 wool-synthetic blend with 32 ounce face weight, or a full-coverage broadloom in 12-foot widths. The process demands patience, knee protection, and a rental power stretcher, but you’ll save approximately $1,500 in professional labor costs while achieving custom results. What separates a trip hazard from a durable, code-compliant installation comes down to ten specific steps that balance material science, precise measurements, and tension mechanics.
Can You Install Stair Carpet Yourself? (Tools, Skills, and Time Needed)
How much can you realistically tackle on your own? You can handle carpet installation on stairs if you own basic tools: an awl, knee kicker, carpet stretcher, rubber mallet, and stapler. You’ll spend several hours on a typical 13–15-step staircase, with additional time for landings and seams when using multiple sections. Your success depends on three core skills: measuring each tread and riser with precision, cutting carpet strips for individual steps, and centering the carpet on the bottom edge before you secure it. Select padding slightly narrower than your runner, tucking the pad edge behind tack strips; this prevents wrinkles and extends carpet life by 30–40%. Choose between the waterfall method, which installs faster but grips less securely, or the cap-and-band approach, which delivers a neater, more formal finish with enhanced durability.
Recommended Products

Carpet Tucking Tool, 3-11/32" Wide Carpet Tucker and Stair Tool for Carpet Installation

Used to crease carpet along stairs and to tuck carpet into tack strip gullies

Coloch carpet tucking tool measures 8.3 inches long with a 3.5 inches wide blade, designed for a quick and efficient installation. With a flat edge, it offers perfect control for detailed carpet installation and seam tucking, especially in corners and on stairs.
Clean, Repair, and Mark Stair Center Lines
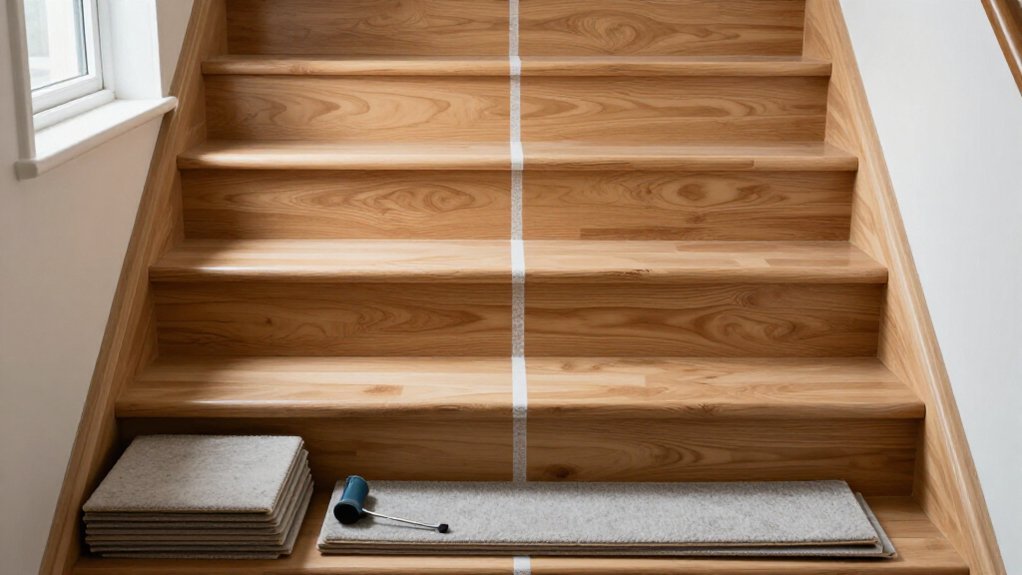
You’ll start by sweeping the stairs to remove dust, debris, and loose fasteners, then secure any squeaky treads by driving screws, typically 2-1/2 inches in length, into the framing beneath to eliminate movement and noise before you measure each tread’s full width, record any variations you find since stairs often differ by 1/8 to 1/4 inch between steps, and mark a precise center line by halving each tread’s horizontal span with a tape measure and straightedge so your carpet runner, usually 27 or 32 inches wide for standard 36-inch treads, aligns perfectly for symmetric placement; finally, you’ll chalk both edges of the runner’s intended position, generally leaving 3 to 4 inches of exposed wood on each side, to guide consistent overhang and balanced visual proportions.
Recommended Products

NON-SLIP STAIR RUG: Multi-purpose Stair mats to use the TPE Non-Skid backing on dry floor, helping it to stay in place on your floor, it won't slip or scuff floors. Low profile design so doors won't get stuck.Perfect for homes with pets (dogs or cats) or kids.

❤Comfortable & Noise Reducing - 15-Piece Stair Treads Carpet is made of polyester, High-density wool blends on the stair cover surface make you feel soft and comfortable on bare feet. Proper thickness can reduce the noise generated when going up and down the stairs, and provide you with a quiet and relaxing environment. They are an excellent choice for anti-slip protection.No crease, no curl, no fading.

Noise-Reducing & Wear-Resistant Polyester Surface: TranquilMoments carpet stair treads feature a high-density Polyester surface that effectively dampens daily footstep noise (ideal for quiet mornings or evenings), while shielding stairs from long-term scuffs and wear, extending their lifespan
Clean and Prepare Surface
Before you unroll a single yard of carpet, ask yourself whether your stairs can truly support a flawless installation that will last through years of daily foot traffic, because even the most premium 100% nylon or triexta fiber carpet with a 40-ounce face weight and 0.5-inch pile height will fail prematurely if the underlying surface is compromised by moisture, debris, or structural defects.
You’ll clear every step of dust, dirt, and loose nails, then verify surfaces stay completely dry and debris-free so your carpet padding bonds securely and your carpet fits precisely without buckling or shifting over time.
- Sweep and vacuum thoroughly to eliminate all particles that interfere with adhesion
- Repair damaged treads or risers for the smooth, stable base your carpet padding requires
- Mark center lines by measuring each tread’s full width, dividing by two, and drawing your guideline
Measure tread depth and riser height variations carefully on every single step.
Repair Squeaky Steps
Where exactly does that maddening creak originate each time you climb toward the second floor, and can you silence it permanently without tearing out your entire staircase? You’ll start by sweeping away dust and debris from the stair tread and riser joint, then tighten any loose nails with a hammer before proceeding to deeper repairs. Measure your stair tread width, divide by two, and mark that center line with a carpenter’s pencil so you can locate precisely where movement occurs between the tread and stringer. Drive shims coated with wood adhesive, or use 2-inch construction screws rated for 200-pound shear strength, directly into that marked center point where the tread meets the supporting structure beneath. Step firmly on the repaired area to verify silence, and if you detect residual flex, re-test and adjust your fix before the carpet goes down.
Mark Center Lines
How precisely can you guarantee your carpet runner doesn’t drift left or right as it descends the staircase, creating uneven reveals that cheapen the entire installation? You’ll establish foolproof alignment by marking a center line on every tread, which serves as your unwavering reference point throughout the installation process.
- Measure each horizontal tread width end-to-end, divide by 2, and mark the center line at that exact midpoint.
- Extend your center line marks across all treads to create a continuous visual guide from top to bottom.
- Align your runner’s center with each tread’s center line, checking adjacent marks to confirm straight progression.
This center line methodology eliminates guesswork, ensuring symmetrical overhang and professional results you’ll be confident showing off.
Choose Stair Carpet Style: Waterfall or Cap-and-Band
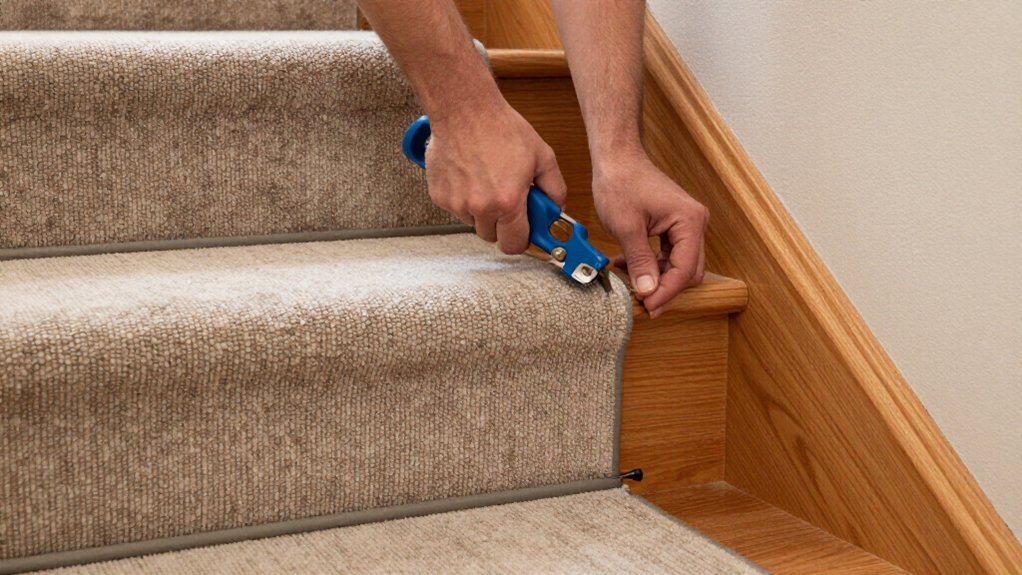
Why settle for a staircase that merely functions when you can select a carpet installation method that transforms your entire space? You’re now facing the critical decision between Waterfall vs. cap-and-band style, two distinct approaches that fundamentally alter your staircase’s appearance and performance.
You’ll recognize Waterfall style by its continuous flow where carpet drapes from each tread directly onto the riser below, creating an unbroken cascade with soft, exposed edges that suits casual, contemporary environments where speed matters: this method typically installs 30-40% faster than alternatives, though you’ll sacrifice some edge security since the carpet lacks mechanical anchoring at each step’s nose.
You’ll prefer cap-and-band style when your project demands refined sophistication; here, you precisely tuck carpet beneath each tread’s protruding lip, a technique called the “cap,” while separately wrapping the vertical riser with its own fabric “band,” eliminating visible seams but requiring 50-100% more installation time. Choose cap-and-band for formal spaces where polished aesthetics outweigh labor considerations, and reserve Waterfall for relaxed, flowing environments prioritizing efficiency over meticulous edge retention.
Recommended Products

Durable Upholstery Tacks: Crafted from high-quality steel, these upholstery tacks come in a 1-pound pack containing approximately 900 pieces in 1 inch size. Their exceptional strength and hardness resist bending and breaking, ensuring reliable long-term performance for all your projects

10Pcs 30cm Carpet Gripper Rods: You will receive 10pcs wood carpet tack strips with pre-installed nails, each carpet fixing strip about 302mm long, 20mm wide, 6.5~17mm thick, which can secure carpets effectively

Ample Quantity for Daily Shared Use: you will receive 6 carpet tack strips, sufficient for your daily application and replacements; These can also be shared with friends or family, ensuring everyone around you has access to reliable tools for their carpet-related projects
Install Tackless Strips on Treads and Risers
You’ll need to understand tackless strip basics before proceeding, since these wooden strips with embedded carpet tacks provide the gripping edge that secures your carpet along each tread back and riser edge. Position your strips flush with the crease where each riser meets its corresponding tread, using a heavy cardboard shield to protect your baseboard and a spacer made from two taped-together strips to maintain consistent height as you work. Nail each strip firmly through pilot holes to ensure secure attachment, adding side strips on landings and riser edges where extra coverage prevents loosening over years of foot traffic.
Recommended Products

A knee kicker is not a stretcher to remove wrinkles in carpet – it is a positioning tool only.

Adjustable knee kicker for all carpeting installations

Durable Aluminum & Steel Construction: Built from lightweight aluminum and reinforced steel, this carpet knee kicker is strong, corrosion-resistant, and designed for long-lasting DIY carpet installation projects.
Tackless Strip Basics
The installation of tackless strips, which are narrow wooden strips measuring roughly 1 inch wide and 4 feet long and embedded with hundreds of angled pins or tacks designed to grip carpet backing without visible fasteners, forms the structural backbone of any professional-grade stair carpeting job. You’ll position these wood strips, each containing densely packed angled tacks that bite securely into carpet pile, along both treads and risers to create reliable anchor points.
Follow these essentials:
- Drill pilot holes with a 1/16-inch bit to prevent wood splitting when securing strips.
- Insert a spacer between each tackless strip and adjacent baseboards to protect finished surfaces during nailing.
- Add supplemental strips to landing edges and riser sides where extra gripping surface ensures complete coverage.
These steps establish your foundation before precise placement.
Proper Placement Technique
With your pilot holes drilled and your cardboard spacer ready to protect baseboards from stray hammer blows, you’re now positioned to secure each tackless strip exactly where it needs to go. You’ll set strips on every riser and the back of each tread, creating parallel rows of carpet tacks that grip the carpet from two angles when stretched. Use two strips taped together as a height spacer to maintain consistent positioning before nailing. At edges and corners, angle strips precisely so carpet stretches over them without gaps or uneven seams. This dual-row system, with strips typically placed 1/4 inch from each surface edge, maximizes holding power while accommodating standard residential carpet weights from 30 to 50 ounces per square yard. Check alignment; deviations compromise tension distribution.
Securing Strips Firmly
Even though you’ve aligned each strip with precision, you’re not done until you’ve driven every nail that locks these wooden tack carriers into solid anchoring positions across your staircase.
To secure your tack strips with professional results, follow this process:
- Slide a protective heavy cardboard spacer between each tack strip and adjacent baseboard to prevent dents or marks during your nailing process.
- Build a quick verification spacer by taping two strips together, then use this tool to set and confirm correct strip height before you commit to permanent nailing.
- Drive nails through each tackless strip along front tread edges and back riser edges, maintaining flush positioning at every corner so your carpet folds without gaps or wrinkles.
Your continuous anchoring line now grips carpet edges across every step.
Cut and Secure Padding to Each Step
Before you secure a single staple, you’ll want to measure and cut your padding, typically a 7/16-inch thick, 6-pound density rebond foam made from 100% recycled polyurethane, so that each piece fits precisely between the tackless strips, those angled metal tracks that grip carpet backing, and the outer edges of every tread. You’ll use a utility knife and straight edge to achieve clean, accurate lines on each piece of padding. Start installing padding in the middle of each tread, then staple along its length to fasten it firmly to the surface. Staple just in front of the tackless strips so the pad sits flush with the tread edge. Wrap padding around the stair front and down the riser, trimming excess for a tight, crease-free fit. Verify alignment with tread profiles before final stapling.
Recommended Products

【DURABLE MATERIAL】Made from plastic materials, the carpet tucking is durable and long-lasting, and can be used for a long time. Easy and quick installation of carpets and repairs of seams with the carpet installation tool.

ADJUSTABLE DAMPING: Without the elastic rubber gaskets, the stair tool (two side ends) can still stay locked down, but it may not hold the shape if accidentally bumped. So adding the elastic rubber gaskets between the template and ruler helps the stair gauge stay locked down as securely as possible, both to prevent slip and to protect the ruler from scratching.

3-1/2" Wide blade tucks carpet tightly and securely around fragile or finished materials, along Wall Line, Into Stairway Crevices and Gullies
Position Padding Without Blocking Tack Strips
How do you ensure your padding stays precisely where it needs to be without interfering with the grip strips that’ll hold your carpet in place? You position your carpet padding with deliberate precision, keeping it aligned against the back of each tread while maintaining that critical 1-inch minimum clearance from the edges where tack strips grip.
Follow these essential positioning steps:
- Align each carpet padding piece so its top edge sits flush against the tread’s back edge, never overlapping where tack strips anchor at the riser-tread junction.
- Verify your carpet padding runs narrower than your planned runner by at least 1 inch on all exposed sides, ensuring fasteners remain fully accessible.
- Smooth every carpet padding section completely flat, eliminating wrinkles or gaps that could shift and obstruct strip functionality before you secure with tape or staples.
Recommended Products

【Real material, Superior quality】 The surface of this non-slip stair treads mat is made of polyester material, which is soft and wear-resistant. It is durable and does not easily pull and pile up. The proper thickness not only ensures that you can step comfortably on our stair step rugs, but also helps keep your feet out of the cold stairs. Reduce the noise of going up and down the stairs, giving your family a quiet and relaxing environment.

Solid Brass construction: These carpet holder clips are crafted from solid Brass with a PVD finish that resists tarnishing and corrosion, maintaining a polished appearance with minimal upkeep.

Non-Slip TPE backing: Unique TPE (thermoplastic elastomer) formulation that requires no adhesives and leaves no residue. Our 28"×9" carpet stair treads grip firmly so kids, seniors, and pets can climb confidently every day.
Measure and Cut Carpet: Full Coverage or Runner Style
Whether you’re covering every inch of your stairs wall-to-wall or installing a sleek runner that exposes the wood beneath, you’ll need to measure with surgical precision because carpet, which typically comes in 12-foot or 15-foot widths for residential applications, doesn’t forgive estimation errors that leave you short at the landing or waste hundreds of dollars on excess yardage. Measure each tread depth and riser height separately, then multiply riser height by the number of risers and tread depth by the number of treads, adding 6 inches for waste before converting to feet and rounding up. If you’re using multiple runners, add an extra 12 inches for seams and include all landings in your total linear feet calculation. Cut carpet into pieces for each tread and landing, adding 4 to 6 inches to width for edge coverage, using templates for uniform stairs or measuring individually if steps vary. Mark each tread’s center by dividing end-to-end width by 2 to align runners consistently. Prepare padding first, keeping it at least 1 inch narrower than your runner, then staple from the center outward just in front of tackless strips before laying carpet pieces.
Recommended Products
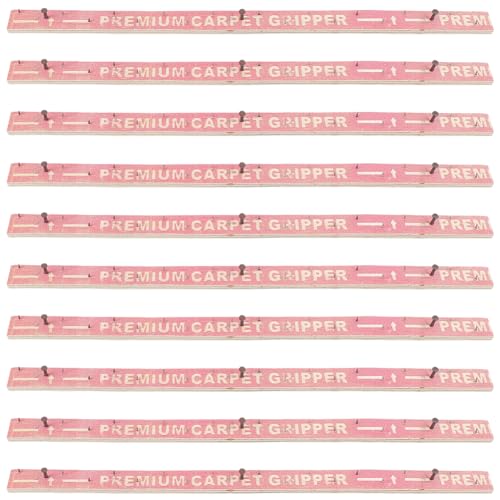
10Pcs 40cm Carpet Gripper Rods: You will receive 10pcs wood carpet tack strips with pre-installed nails, each carpet fixing strip about 402mm long, 20mm wide, 6~17.5mm thick, which can secure carpets effectively
NON-SLIP STAIR RUG: Multi-purpose Stair mats to use the TPE Non-Skid backing on dry floor, helping it to stay in place on your floor, it won't slip or scuff floors. Low profile design so doors won't get stuck.Perfect for homes with pets (dogs or cats) or kids.

Extra-Wide 4" x 30YD for Large Rugs – One roll covers more ground than standard narrow tapes, so you stop buying multiple small rolls. The 4-inch width and 30-yard length anchor large area rugs and high-traffic zones with fewer strips, saving you time and money on every project.
Start Carpet at the Bottom Step and Work Upward
Where do you begin when every step above threatens to throw off your alignment? You start at the bottom step and work upward, establishing your pattern with the natural flow of the staircase.
- Center the carpet on the bottom edge of your first step, then push it firmly into the tackless strips to lock the starting edge in place.
- Staple the carpet to the riser below the tread, keeping your fasteners clear of the fold so you’ll achieve a clean, professional crease without puckering.
- Grab your kneeling or tapping tool to settle the carpet nap evenly, which prevents visible staples from marring the edge while you maintain proper tread and riser alignment.
As you continue up each step, you’ll keep the carpet centered and aligned with each tread and riser transition for a secure, consistent finish.
Recommended Products

3-PIECE INSTALLATION KIT — Includes a 16.5-inch knee kicker, an alloy steel carpet tucker with stair tool blade, and a dual-position carpet cutter. Everything for a small install in one box.

Contractor-Grade Knee Kicker: professional-quality carpet knee kicker built for daily use by carpet installation pros and serious DIYers

Designed to tighten and repair loose carpet in small spaces like hallways and closets
Stretch, Staple, and Nose Each Tread
Why wrestle with wrinkles when you’ve got the right tools in hand? You’ll stretch the carpet onto each tread using a knee kicker and carpet stretcher, which removes wrinkles and achieves a tight fit against the tack strips. Next, you’ll staple the carpet to the riser below the tread, taking care not to staple through the fold where the tread and riser meet. You’ll ensure the carpet wraps neatly around the nosing by tucking and securing it with a rubber mallet and stair tool. Align the carpet edge to the centerline marked on the tread, maintaining straight sides and preventing cull seams. Finish each tread by trimming excess carpet and pressing the edge down into the tackless strip to lock the installation in place.
Recommended Products

Makes Hollywood Stairs easier

Tucks all carpet for a clean, finished edge
【Durable Plastic Material】This carpet tucking tool is made of high-strength plastic for long-lasting durability and reliable daily use. Ideal for carpet installation, seam repairing, and floor welding projects, providing stable performance for professional and household applications.
End Clean at the Landing: Hem and Secure
Once you’ve locked the final tread into place, you’ll carry that same momentum up to the landing, where a clean finish separates a professional-looking job from an amateur attempt. Stretch the carpet up to the landing and secure the edge so the seam meets the landing edge without gaps. Verify the landing surface is smooth and free of wrinkles after stretching and securing before final inspection.
Here’s how you’ll hem and secure like a pro:
- Trim any excess carpet on the landing with a utility knife for a neat, exact fit.
- Hammer the carpet edges down along the landing transition, ensuring a tight fit against the back wall and riser.
- Install the transition piece on the landing edge and hammer it firmly into place to create a clean boundary.
You’ll step back and admire a seamless, durable finish that holds up under daily foot traffic.
Recommended Products
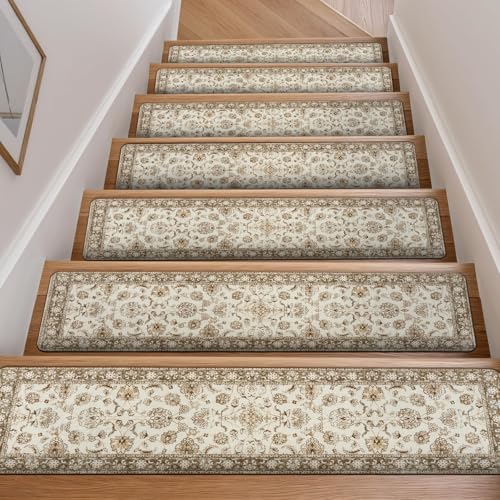
Non-Slip Stair Treads: OJIA non-skid stair treads feature reliable anti-slip rubber backing, ensuring they stay securely in place on your stairs and making every step safer for kids, elders, and pets. Note: Not carpet, these stair treads are printed rubber mat.

Secure Your Loved Ones: Our stair treads for wooden steps are your anti-slip solution. The anti-skid bottom provides strong grip and allows you up and down freely. Your family and your pets will not be worried about stepping on stairs any more. Suitable for homes with kids, seniors, or pets (dogs or cats)

Non-Slip TPE backing: Unique TPE (thermoplastic elastomer) formulation that requires no adhesives and leaves no residue. Our 28"×9" carpet stair treads grip firmly so kids, seniors, and pets can climb confidently every day.
