



Like Michelangelo releasing a figure from marble, you will discover that precise ceiling tile cutting demands the right tools and measured technique rather than force. Your project success hinges on understanding how 1/2-inch tolerances interact with grid systems, which utility knife blade angles prevent crumbling, and why that tapered reveal edge matters for professional results. The method reveals itself in five deliberate steps that transform raw mineral fiber, typically 3/4-inch thick with 2-by-4-foot or 2-by-2-foot standard dimensions, into seamless ceiling components. You will need specific guidance on scoring depth, cross-T alignment, and test-fit adjustments that separate amateur gaps from contractor-grade installations. The complete process awaits your attention, delivering measurable outcomes with tools you likely already own.
Measure Drop Ceiling Grid and Add 1/2 Inch
Why guess at your ceiling tile size when a precise measurement saves you time, money, and frustration? You begin every ceiling tile measurement by measuring from the inside edge of each grid piece, then you add 1/2 inch to account for the precise cut and snug fit your installation demands. You use the tile edge reveal, the visible border that sits below the grid after installation, as your critical reference point to verify alignment. You mark with utility knife blade rather than pencil, creating a sharp, transferable line that guides your cut without smudging or fading. You account for off-set differences between tegular vs square tiles, recognizing that tegular tiles, with their recessed reveal edge, and square lay-in tiles, with their flush profile, require slightly varied approaches. You aim for clean, dimensioned cuts that align with standard 2-foot cross-T guides for straight, repeatable results.
Recommended Products

Precision Cutting: Achieve clean, sharp edges on shadowline ceiling tiles effortlessly.

This precision tool is ideal for cutting rabbets in ceiling tile to achieve crisp, professional-looking shadow lines

Soft Touch, Non Slip Handle Insert
Score the Ceiling Tile Using a Cross-T Guide
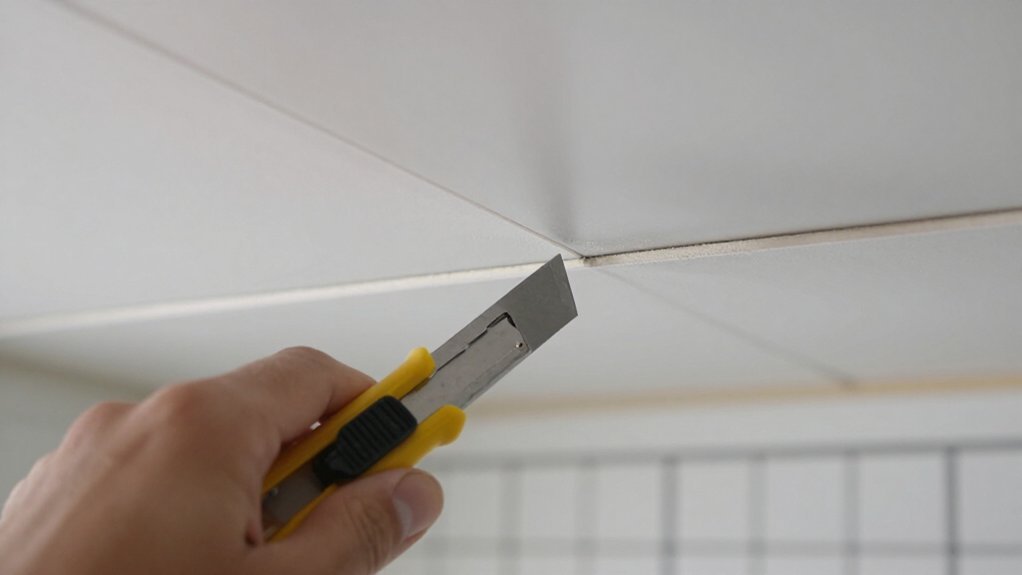
How do you transform a marked ceiling tile into a clean, professional cut without the wobble of freehand scoring? You’ll grab a 2-foot cross-T guide, which functions as a rigid straight edge, and align it precisely along your pencil-marked line to score the ceiling tile with confidence and repeatable accuracy. Position your sharp utility knife at the starting edge, then draw it firmly across the surface in one steady, controlled motion; you’ll repeat this scoring action 2 to 3 times, allowing each pass to gradually deepen the cut until the tile separates cleanly. Remember, your cut line must sit about 0.125 inches shorter than your measured length, a specification that accommodates predictable material breakage during flexing. After scoring, gently flex the tile to test the seam, confirming it’ll break cleanly like a crisp cookie along your established score.
Recommended Products

WATERPROOF PVC THAT WON'T SAG OR STAIN - Unlike traditional fiber ceiling tiles, durable PVC construction is waterproof and everyday wear. Perfect for kitchens, bathrooms, laundry rooms and other high-moisture areas.

WATERPROOF PVC THAT WON'T SAG OR STAIN - Unlike traditional fiber ceiling tiles, durable PVC construction is waterproof and everyday wear. Perfect for kitchens, bathrooms, laundry rooms and other high-moisture areas.

24-Inch Ceiling Tiles: Each piece measures 24" x 24". These ceiling tiles feature a clean, modern style to refresh your space with ease
Cut the Tile Side to Form the Reveal Lip
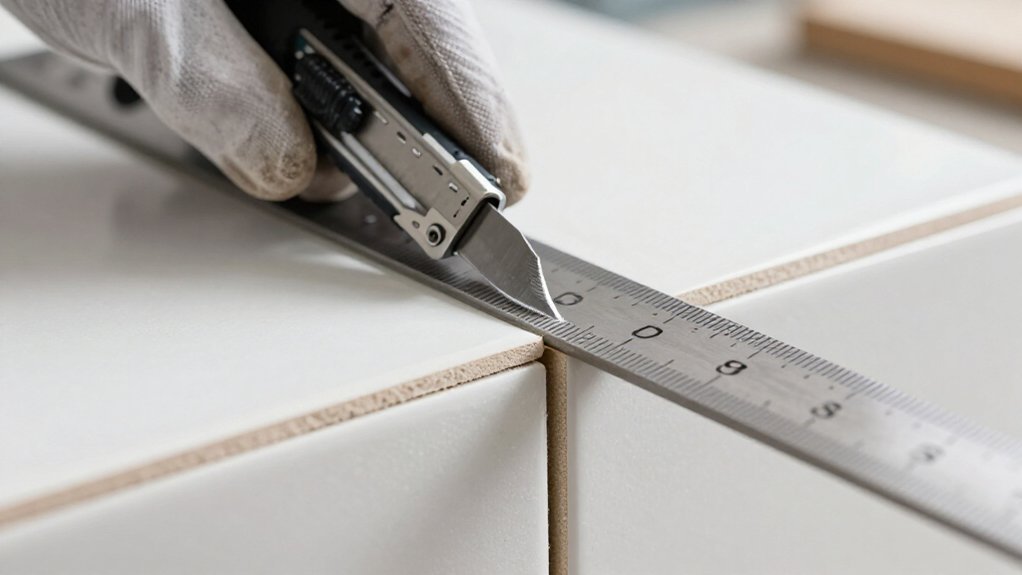
With your ceiling tile now scored and separated to the correct length, you’ll turn your attention to the edge that rests on the grid, where a properly formed reveal lip ensures clean, professional seating without visible gaps. Lay the tile flat on your work surface to prepare the reveal, marking precisely where the side cut will create the lip along the edge that contacts the suspended ceiling grid. Position your knife blade to run parallel along this edge, making a shoulder cut, which is a horizontal cut establishing the reveal lip. You’ll want to use an OLFA utility knife with an extended blade, as this improves angle control and reduces granule build-up during the side cut. Score the tile’s side repeatedly, removing the top half of the edge to form the lip that sits on the grid. Keep your initial cut shallow, gradually deepening with multiple passes for a cleaner, more professional reveal lip on your ceiling tiles.
Recommended Products
Heavy duty utility blade for general cutting, trimming, and scraping of a variety of materials

Notice: Be sure to watch our HOW-TO video before using it. It can help you slide the utility blade out quickly and easily

SK5 Steel Durability: Made from industrial-grade SK5 high carbon steel, these heavy duty utility blades provide exceptional hardness and edge retention. Compared to standard carbon steel, SK5 offers improved wear resistance and extended life span, ensuring fewer blade changes and higher efficiency during cutting tasks. Whether you're working on renovation projects, packaging, or construction sites, these blades can handle tough materials like carpet, drywall, rubber, and rope with ease
Back Off 1/2 Inch and Cut the Vertical Face
Now that you’ve formed the shoulder cut along the tile’s edge, you’re ready to establish the vertical face of your reveal, which is the perpendicular wall that drops down from the lip and creates that clean, shadowed line where the tile meets the grid. Begin your tile cutting by setting your measurement precisely. Back off 1/2 inch from the un-chamfered edge before committing to the vertical cut. This precise offset prevents tearing and reduces chip-out along the vertical portion of your reveal. You’ll maintain the same knife angle you used for your previous cut to ensure continuity. Using a sharp blade, recommended by OLFA for this specialized task, execute a controlled down cut. Make multiple light passes rather than forcing one deep cut to avoid overcutting this visible edge.
Recommended Products
1 case of 12 Packs, 12 Count Total

1 case of 12 Packs, 12 Count Total

For DIY Enthusiasts: Ultra-easy installation fits standard ceiling grids, so you can install 12 tiles (48 sq.ft) in minutes without tools or glue
Test Fit the Cut Tile and Trim if Needed
Your vertical cut is complete, and you’re ready to verify the fit before locking in your installation. Perform a test fit by placing the mineral fiber tile back into the grid alignment to check reveals before final installation. Verify that the tile is completely separated along the cut line before removal to avoid tearing or jagged edges.
- You slide the tile upward, angling it through the grid alignment before letting it settle into place.
- You inspect the perimeter, eyeing the gap between the cut edge and the painted wall reveal.
- You mark any overlap with a pencil, preparing to trim paper-thin shavings rather than re-cutting large sections.
- You ensure the cut edge faces the wall, creating a cleaner border appearance with consistent shadow lines throughout the ceiling plane.
If the tile doesn’t seat properly, re-check your measurements and trim only the necessary short section.
Recommended Products

PREVENTS SNARES: Perfect for preventing the snaring or snagging of cables in drop ceilings, this funnel is perfect for protecting cables and ceiling grids while pulling cable

【Premium Waterproof PVC】The Sunnyglade ceiling tile constructed using superior PVC, this product offers superior resistance to moisture, oil, rust, warping, and discoloration, ensuring long-lasting performance. The 5mm panels in thickness also with superior fire and heat resistance, enhancing safety while reducing space noise

INSTALLATION: Easily lay into a standard 15/16" T-bar drop ceiling grid system or glued over any flat substrates
